I have posted both lessons of this Unit below. You can download both lessons in Microsoft Word format here: Download Stamp Lessons
These lesson plans are copyrighted © and may be reprinted with my permission and only if you give me credit for them.
Go to Lesson One.
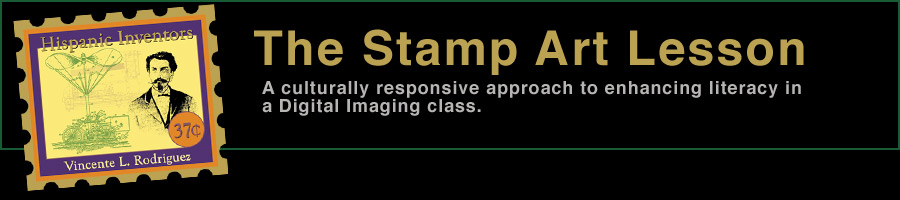
Lesson Two / Creating a Stamp Honoring a Minority Inventor
Situating the Lesson
This is the second of two lessons which will use the Fundamentals of Design, the Art Elements and skills learned in the Adobe Photoshop program to create stamp designs commemorating minority inventors.
California State Content Standards Addressed in this Unit: 1.0 Artistic Expression, 2.0 Creating, Performing and Participating in the Visual Arts, 3.0 Understand the Historical Contributions and Cultural Dimensions of the Visual Arts, 4.0 Responding to, Analyzing and Making Judgments About Works in the Visual Arts, 5.0 Connections, Relationships, Applications
Objective:
At the end of this lesson students will be able to use Photoshop to design their own stamps honoring minority inventors. They will be skilled in such features in Photoshop as selecting, layers, and using the Type Tool. They will use these features and others to design stamps arising from their own ideas and following a proper design structure.
Agenda
1. Review of the Photoshop Toolbox
2. Layers in Photoshop
3. Putting it all together in designing a stamp.
Into Activity / Review of the Photoshop Toolbox
With the use of an LCD projector attached to a computer review the basic features of the Photoshop tool box. These have been covered in previous weeks in detail. Give examples of the use of particular tools that will be used to create a stamp in this lesson.
Through Activity / Layers in Photoshop
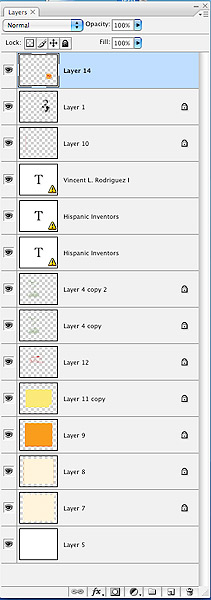
Pass out the handout which visually explains the different features of Layers in Photoshop.
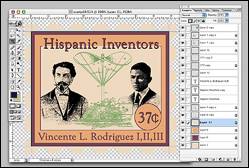
Explain the features of Layers in Photoshop and demonstrate how the stamp example above is really a series of layers one on top of the other.
Explain the advantages of layers and demonstrate how colors and designs can be changed easily.
Features to demonstrate include: Masking, New Layers, Grouping in Folders, Special Effects, Merging, Linking, and Properties.
Closing Activity / Putting it all together to Design a Stamp
Demonstrate the process for designing a stamp from thumbnail, to final design. Show students how they can use the graphics they have collected (Homework) in their stamps for the inventors they have chosen.
Assess for learning.
Quiz students on how each feature works and which are how they may be used by them when creating their own stamps.
Assignment:
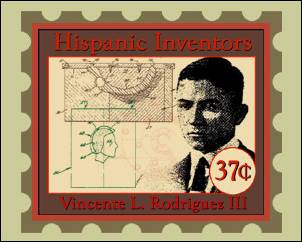
Students are to prepare thumbnail ideas (at least 4 variations) for their full size stamps. Each stamp should include a graphic of the inventor, the invention (or a patent drawing), or both.
The final version thumbnail must be approved before proceeding to the full size final.
Final Image Size: 8 inches X 6.5 inches @ 300 pixels per inch (this is a good size to print on 8.5 X11 photo paper and include student name at bottom of image.)
Materials Needed:
Computers, Adobe Photoshop licensed program.
Assessment: Students work (product) will be assessed as one according to the following Rubric:
|
A |
B |
C |
D |
F |
Technology Skills |
There is a strong and effective use of technology. Work is neat and orderly. |
There is a good and effective use of technology. The work is neat and orderly. |
There is some good use of technology skills. The work is mostly neat and orderly. |
There are some technology skills. The work is somewhat neat and orderly. |
Poor or no evidence of technology skills. Work is not neat or orderly. |
Design Skills |
There is a strong Evidence of the Fundamentals of Design |
There is good evidence of the Fundamentals of Design. |
There is some evidence of the Fundamentals of Design. |
There is little evidence of the Fundamentals of Design. |
There is little or no evidence of the Fundamentals of Design. |
Creativity |
The Student created an Original interpretation of the subject matter for the assignment. The work is aesthetically pleasing. |
The student created a good interpretation of the subject matter for the assignment. The work is aesthetically pleasing. |
The student created an interpretation of the subject matter for the assignment. The work is somewhat aesthetically pleasing. |
The work is not original, and is only somewhat aesthetically pleasing. |
The work is not original, or complete and lacks aesthetic value. |
Communication Skills |
The message is delivered in a clear, obvious and precise manner successfully. |
The message is delivered clearly and is successful. |
The message is delivered clearly but is only partly successful. |
The message is not delivered clearly and is only partly successful. |
The message is not communicated successfully. |
Effort |
The student has worked hard to fulfill the requirements of the assignment. The assignment is completed on time. |
The student has worked well to fulfill the requirements of the assignment. The assignment is completed on time. |
The student has put in little effort to meet the requirements of the assignment but the assignment is on time. |
There is little obvious effort to work on assignment. The work is finally completed late. |
There is no effort to work on the assignment and the assignment is not completed. |